mama scout lab e-course

Showing posts with label art. Show all posts

Monday, March 6, 2017

is being online hampering your creative expression?

The NYT Magazine's On Technology essay by Jenna Wortham this week speaks to much of what I (and I suspect my friends) have been thinking about lately. How can wide freedom of creativity and connectedness happen online? And in what ways does the very fact of it being online limit the conversation?


“The internet should be a place with no rules, and freedom, but it’s not,” PiƱero said. “There is a certain pressure to conform to certain aesthetics.” It was something I had noticed myself. Each social-media platform tends to reward certain behaviors and styles of posting, all in the interest of building fans and followers who are invested in the performance of a persona (maybe even more so than the Geppetto-like person orchestrating it all). Instagram is a place for intimate-seeming photos, Twitter for clever quips and collaborative memes. Facebook demands an unmitigated rawness that can be terrifying at times. With all, the works are often made to fit the platform, not the other way around.


read the article here.

Monday, March 28, 2016

performance art with kids


In the two weeks before our big move, our co-op conceived, wrote, created, rehearsed, and performed a collection of performance art pieces on the topic of animal rights. At times, it really felt like we had taken on too much (packing a pod, finding a new house, painting canvases, researching, making shadow puppets, getting some animal dental surgeries taken care of...oy!).

But, I kept thinking.

When we are in the toughest moments of our lives, what is the first thing to stop?

Usually the thing you need the most (art, eating properly, writing, hanging out with friends). Does this happen to you, too? So, whenever I thought, "oh! this is too much!" I readjusted my thoughts and said, "this is exactly what we need to be doing." By engaging in such a creative and important project, we were able to deeply connect with our very dear friends who we would be leaving soon. We also kept so busy that we were able to make our move with minimal emotional upheaval.

It was a whole different way of approaching life, and I am sold. Keep the art when stresses are high and you will come out the other end with fewer scratches.

I have included some notes on our project, because I am committed to sharing exploratory, project-based learning with older kids on this blog. There is a lack of middle and high school homeschooling representations online (please share any resources you like), and I will try my best to report on the ideas and approaches that work for us. 


Background
Animal rights are not a new subject for most of the kids in the co-op. We have supported a Florida based sanctuary for chimps coming out of the entertainment industry, my kids have created signs and protested outside the circus, we have had heated discussions on the use of Orca whales at Seaworld, and several of the kids have become vegan. These kids love animals! 

We talked about all the ways you can protest and bring attention to issues that are important. From passively leaving zines in public, to holding signs, to supporting (and pulling support from) organizations, to sharing your personal story and to creating artwork and perforative experiences. As a group, we decided that we wanted to create an evening of performance based art to share the spectrum of our beliefs and stories. 

What?
We had three groups of kids (2-3 each) who each created a performance piece. They chose to work with issues surrounding animal rights. Veganism, animal testing, animals in entertainment, seal hunting and the arctic and the big cats of Florida were all showcased.

The kids made zines, wrote poetry, wrote a shadow puppet play, and created dialogued content sharing pieces. They also painted canvases to decorate the gallery and auction off, cooked a few vegan goodies and passed out samples of homemade laundry detergent. After the performance, which lasted approximately a half an hour, people were invited to stay, mingle through the gallery and chat - which they did!~

Why?
It is important to know, that the topic and the shape of the performance was kid driven all the way. And during the whole project, I kept thinking how amazingly lucky these young people were to have such support for their voices and ideas. They created knowing there would be a real audience at the end and that their work could impact and change minds. They were taken seriously and the key to the power of possibility was placed firmly in their hands. What a gift for tweens/teens!

How?
We hired a local theatre instructor and rented a space to meet. Both of these were relatively inexpensive because we have relationships with the women we worked with. You can do this on your own too. There is no reason you can not meet in the park, the library or your own living room. And you can lead the kids yourself, we just wanted to offer our kids the chance to work with another adult mentor. 

We met 3x a week for 2 weeks and ended with the performance. Our schedule was squished together because of my family's impending move (originally we were going to spread the class out over 6 weeks) and I think that the energy with this compacted schedule. I am not sure it would have been as sustainable and passionate if we took longer. We were consumed daily with the causes that were so important to us, and it drove us to get our work done. 

Where?
We have a local arts organization that opened their doors and invited our troupe to perform. We packed the space with our friends, families and ripples of personal connections throughout the community. The kids were amazed to see so many people come out and support their work and their vision. The raised hundreds of dollars through art sales and donations that went directly to the organizations they chose. And they have been invited to perform at other local arts festivals. This just might be the beginning for them! 


Monday, December 14, 2015

{art} collabs with olders


For Christmas I asked each of my kids if they would paint a collaborative painting with me. This is tricky territory because I have trained myself over the years to let them paint with little direction and normally can not imagine laying paint on their artwork. 

But this was different. We thought of it as an experiment and I love the results. We picked poems by  Dickinson, Wordsworth and Berry to work into each piece. I suggested that they paint an animal or scene that reflected their interests and personality and they sketched in the design. My help was more with painting backgrounds and adding touches here and there. 

I love what they (we) made and now have a great poetry corner in our eating space. I am sharing here because it feels like such a good connecting and creative project to do this time of year. It was the perfect present and I think we will incorporate this approach more often. 


Friday, October 30, 2015

{explore} mural art in St Petersburg, Florida


If you are in the Tampa/St. Pete area, I encourage you to spend an afternoon touring downtown to enjoy all the mural and street art. St. Pete encourages and supports public mural art in a big way which makes the city vibrant and visitors lucky. The recent Shine festival helped add even more art to the walls. You can read more about the artists and get a tour map here

*And for refreshments, we love Bodega and Banyan Cafe.


Monday, October 5, 2015

{project} stuffed memories


In the fall session of Journal Jam we have been drawing, painting and writing about our stuffed animals. This activity is the perfect project for a family art night.

Ask each kid (and adult) to bring a stuffed animal that they have had a long time and really treasure to the table. We drew ours with pencil, outlined with a Sharpie marker and then water colored. Kids can share their memories orally, dictate to an adult or write them down themselves.

Looking closely at sentimental objects slows down time and offers a restorative meditation to everyone at the table. And the finished product will be cherished and adored down the road.

Be sure to share a link in the comments if you do this. I would love to see your journal entries.

Saturday, July 19, 2014

{writer's lab} zine making with kids


We have spent a lot of time the last few months making zines. Zines (short for magazine) are an inexpensive, alternative media that have been popular since the 1920's at least. Some might say that early pamphlet and booklet writers from the early days of the printing press were the first zinesters.

Typically, zines are hand written or typed, glued together, and photocopied. The accessible materials and publishing method have made it attractive to punks, skate culture and various fan fictions. The marginality lends zine writers a certain freedom in their creation. Since you are writing for a small audience and you can print issues as needed, the subject matter can be as arcane as you wish.


This highly specialized content makes zines perfect for kids to create. They can write about anything they want, include as many pages as they want, and distribute freely (or very cheaply) among their friends. 

I especially like that it is so much more physical than blogging or other online publishing methods (which I obviously love too). The actual writing, cutting, gluing, driving to the copy shop, copying, collating, folding, stapling or binding - all gift the zinester with the wonderful experience of actually participating in the entire process, in real time. I love that and think it is often missing in our lives. 


So are you ready to get started?

We started in our house with my zine making. I made a little zine for the Journal Jam lab I am running this summer. I made this because I wanted to send participants something real and tangible in the mail. I am smitten with real mail these days and this project was an extension of that passion. Making a zine was also on my TRY THIS list. 

So, the kids watched my process and then became interested in making zines themselves. They started making zine/workbooks for classes they were leading in our homeschool co op. My 8yo son, who is a big Keri Smith fan then branched out to making several zines of creativity prompts. 

We were also involved in a really cool, co op camp recently. One of my jobs was to create a zine of the experience. I had wanted to include the camp kids more but time was extremely limited. Instead, I listened for quotes, took notes and pictures, and included as much of the kids experience as possible.

The subject of your zine can be anything! It can be your poetry, recipes, journal entries, cartoons and art, fan based (My Little Pony, Lego, Harry Potter), open ended prompts, a story, tutorials and musings. Or all of it! 

You can write the whole thing yourself or ask your friends and family for submissions. 


Once you have a list of topics compiled and you have narrowed it down to one to start with, you....start!

Making a list of what you want to include in your zine is a good idea. 

I usually make a mock up first. That is just blank paper folded with page numbers and notes about what will go on each page. If you are doing front and back, folded 8.5x11 in paper, you might be surprised at how quickly it gets confusing. I constantly refer back to the master. 

Also, if you are going to do double sides pages, do them on individual pages and have the copy shop help you make a master from these. It is really impossible to draw, tape and write on both sides of paper and not have it bleed through to the other side. 


We like to use a wide variety of writing styles within the zine. I will print, write cursive, use fonts from the computer, utilize different markers, use a typewriter and find words from magazines. The variety can make the zine feel energized and alive or cluttered and hard to read, so work with finding the balance that you like.

Adding 
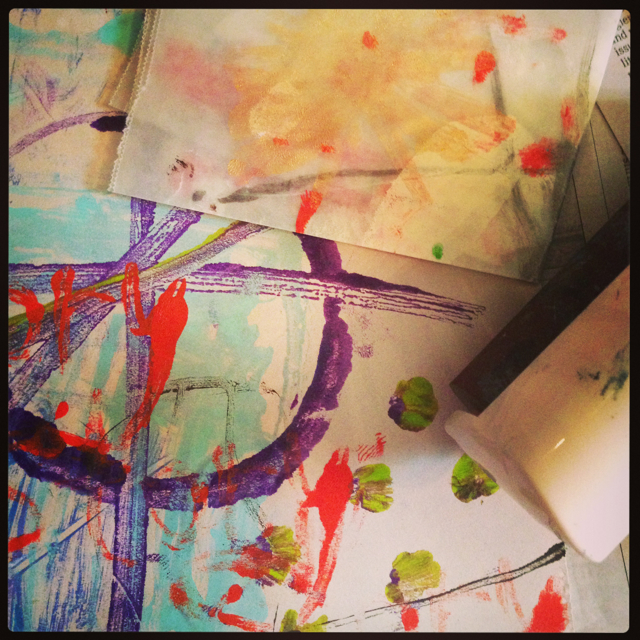
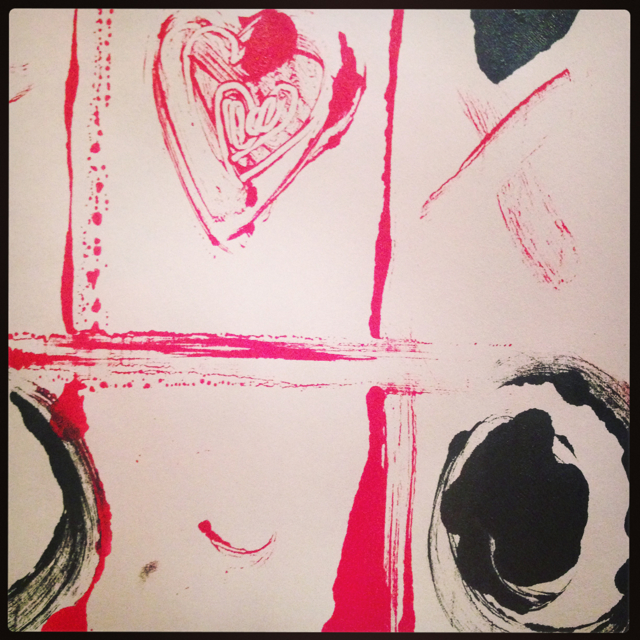
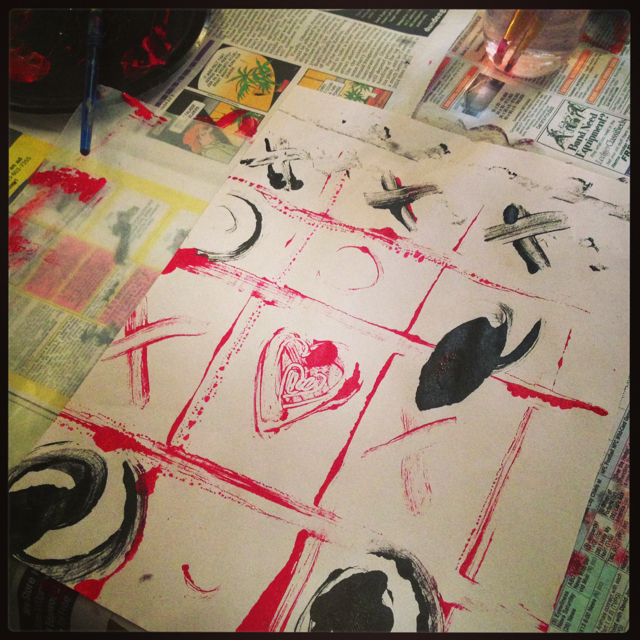
decorative touches is fun too. Rubber stamps, stickers, photographs, little drawings and my favorite, washi tape, can all photocopy in black and white nicely - so experiment and have fun.

When you have everything written, decorated, and organized, it is time to head to the copy shop. As much as I would like to do all the photocopying myself, I rely on help from the copy master. After talking with him, it was revealed to me that the copiers behind the counter have much better image quality that the ones used in self serve. The public copiers are all preset and have fewer options (this is at my copy shop - yours might be different). So, I work with the experts; they have been exceptionally helpful to my kids and myself.  Our runs usually range from 10-20 copies at a time.

Time to distribute. How will you share your work? We have given ours out to friends, sold them to friends, posted them on Etsy, and given them to community members. You might leave a few at the local coffee shop or in the periodical section of the library. You can send them to friends or even famous people in your content area. Comic shops and record stores might sell them or give them out too. It is up to you to think about where your potential readers might be. If you are a serious zine producer, you can list them on distribution sites, but we are far from that now.

Please leave resources and any experience you have had with zines in the comment section. If you produce a zine, drop me a line and I will gladly promote your work in whatever way I can. I would love to organize a kid zine swap at some point, so log your interest here and start writing and making!


Friday, January 10, 2014

{make} wax paper mono prints


Inspired by this post about plastic bag mono printing, my daughter and I spend a sick day working with wax paper, watered down acrylics, paper and a brayer.

Mono printing is a print making process that makes one unique print at a time. There is no stamp or printing plate that allows you to make multiples. One is all you get.

They are simple and fun.

Basically, we painting designs and abstracted shapes with watered down acrylic paint (sometimes scratching into them or altering the texture in some way.

Then you flip over the wax paper onto your art paper (water color, newsprint, cardboard, anything...) and rub it with your hand or a brayer. I love using a brayer because it gives a consistent pressure along the whole piece.

Carefully peel back the wax paper and see what you have.

Add more layers to it. We just folded our wax paper over onto itself as we added more details.

This activity is great because it is economical and so open ended.

Parents should be at the table playing next to their kids. We have the best time and discover the most when we make art side by side.  If you have a hard time just playing with color - what about making journal pages with spaces that you can write on later? or think about making cards, book marks or gift tag with the resulting fields of color? If nothing else you can have pretty paper for your grocery list.


Monday, July 15, 2013

why i love to paint


it makes me look at objects and light so closely

it is slow

mixing colors is meditative

my kids come join me

it preserves a moment

the tactile, messiness of it

it reminds me that we all see things through a different lens

it is relaxing and productive

it allows me to set goals for more complicated pieces

being an amateur is such a sweet place to be

my expectations are so low it is easy to surpass them

there is no reason to do it other than choice


what is your guilty pleasure? what do you love to do for no other reason other than you love to do it? leave a message in the comments...

Thursday, January 17, 2013

string painting with olders


sometimes i forget about simple, open ended art projects that we did when the kids were younger. 

i might think, oh, we already did that. but that is the beauty of open ended projects - they can be done many times with different results. 

we looked at patterns, and variables, and talked about string theory and worm holes and star births.

what art invitations would you like to revisit?

Friday, November 16, 2012

{geography lab} salt dough land forms


Are you good at geography? I never understood geography until I was an adult. I think for many kids, geography is too abstract and seems meaningless.

I discovered that I learn places on a map from experience, either traveling or through really amazing stories. The notion of memorizing capitals and countries without a tether to something real is about as alluring to me as cleaning the bathroom. Learning metro and train systems, driving through states, or pouring over maps of the places I read about is how I have come to understand the world and its physicality. 

To that end, my kids recently did a project that would be amazing for anyone learning about a specific place. We made salt dough maps of our state. You can see examples of this project all over Pinterest, so I guess it is a classic that was just under the radar for me. It is so simple. 

1. Make salt dough (recipe at bottom)
2. Print out or draw a map of your geographical area
3. We put our map in a plastic page protector. This meant that we could not cook it in the oven, but had to let it air dry. 
4. Put a ball of dough on the map and shape. We used toothpicks to pull the dough into the perfect coastline. 
5. Add specific features (mountains, prominent water features, bays etc.)
6. Let dry. (During this time, we pulled out the map and watercolored the ocean)
7. Paint landform.

You can make these and store them in pizza boxes if you want.


The physical connection to the the land form makes understanding our state so much easier. My kids completely get that there is a high ridge that runs down Florida. (And how that affected the early animals who lived here and why we can find shark teeth in the middle of the state). 

Have you done this with your kids?

What would be the defining feature for your state?


Make salt dough

Ingredients
1 cup salt
2 cups all purpose flour
1 cup warm water

mix and knead for 5 minutes.

air dry or bake at 200 (the time depends on the thickness, so check every 20 minutes)

we paint ours with acrylic craft paint and then seal with a spray varnish


Monday, October 29, 2012

{art lab} finding art in the street


We like to look. And spend a lot of time in the alley ways around our house hunting for things, recording textures, and even hanging poems on trees. When I ran across Carla Sonheim's tutorial on blob hunting, I knew what our next alley adventure would be (and that I had found a great new resource).


We headed out with our creativity journals and looked for shapes that were made from stains, cracks, leaves, shadow or anything that caught our fancy. This exercise required that everyone really look past the actual items they were seeing in the road to the primary shapes that were revealed. 


I was happily surprised at how much we got into this. Despite the fact that we were just going to collect the shapes (and then go inside with art supplies) they stopped to draw what they saw immediately. 

In fact, I was unable to participate as much as I had planned because I was ping-ponging back and forth as each kid wanted to show the magical scenes they were discovering under their feet.


This reminded of a water painting project we did a few weeks ago. 

These sorts of things seem so simple, but are really a linchpin of our curriculum. By just learning to slow down and look, and then imagine, kids' worlds are rapidly expanded. 

They begin to make new connections and see fresh possibilities in even the most mundane circumstances. 


Schools will not teach your children to see maps in paint spills or dancing men in sidewalk cracks. As this is not a quantifiable skill, you will not see it on any worksheet - which is why it is so imperative for parents to provide this type of experience for their children as much as possible. 


This is not about raising dreamers, it is about raising thinkers. 

Thinkers and doers who will create technologies, write novels and plays, and discover scientific breakthroughs because they are able to look at disparate information in unique ways. 


Friday, October 26, 2012

{art lab} japanese paper marbling


A recently mini obsession around here has been suminagashi, or Japanese marbling. 

I originally organized to do this with some friends, but knew my kids would love it too. We had done the shaving cream and paint marbling in the past, but this is even more fun!


Basically, what you are doing is putting drops of ink onto the surface of the water and then manipulating it by pulling a toothpick through, blowing on it or gently tapping the tub.

After you have a design you like, you set your paper onto the surface of the water and like magic all the dye is transferred. 


I bought the ink online(link below) and a stack of dish tubs from the dollar store. I also ordered some special rice paper but as it did not arrive in time, we used plain old computer paper and it worked perfectly (watercolor paper and card stock were NOT good paper options). 


Kids are amazing at this! In fact, I think I liked my kids' designs even more than my friends' designs (shhh!). They were so unrestrained with color and really swirled the water around. My 6 year old was so good he even gave his Grandma a lessons while she babysat him. 


So, what to do with all this paper? We have been making it into little books and journals, doing origami, covering the inside flap of books, making paper garlands, writing letters on it and more. 

Just having a stack of it available in your art area is wonderful. 

And this would be a perfect gift for any art minded kid! 


Have you suminagashi-ed before?


This is the kit I used and I was very happy with it. We marbled well over a hundred sheets and I still have tons of ink left!

Thursday, October 11, 2012

magical scribble drawing (and a book review)


I recently received a review copy of Art Lab for Kids by Susan Schwake and love it! I have given this (and other books in the Lab series) as gifts, so was so happy to get my hands on a copy for myself. 

The book has a lab featuring a different art technique for each week of the year, covering: drawing, painting, printmaking, paper art, and mixed media. Some of the ideas you might have heard of, but there are many new-to-me ideas (gelatin printing, contact paper insects, fingertip painting...). 

I am sure you will be seeing more of our experiments from this book on the blog. 

We are not too big on prescribed crafts at Mama Scout headquarters, so books that offer a new technique that the artist can then apply in whatever way makes sense to him/her have high currency here. 

Art Lab for Kids could easily serve as an amazing year long art adventure curriculum for homeschoolers and other creative families. Working your way through the book would certainly fill your house with so much art and color!


For our first project, we made scribble art, which sounds silly but was actually great fun. 

Each person covers a piece of paper in loose scribbles and then sits back to see what images or shapes might be hidden in the tangled nest of lines. 

We then traced and embellished our found images.  Some of us cut them out and added them to new backgrounds.


What I love about projects like this is that each kid approaches it so differently (which is also why I shy away from step by step craft projects). One kid was amazing in all the things she immediately found, but had no interest in turning them into another art piece. The hunt was enough. 


Another kid immediately found a whale and then created a landscape for him to be jumping from the water. 


My youngest child (like me) had a harder time finding many images, so was content with a bird head. He cut it out and added it to a face that was also a galaxy. 

Listening to him describe what he was making was so poetic. And I think if we did not do so many projects like this, I would miss out on these secret pockets of magic and tenderness that are deep in his mind. 


Check out my Holiday Lab and Family Lab if you want to get creative and connect with your kids. 

LinkWithin

Related Posts Plugin for WordPress, Blogger...